Ich habe ganz viele Fragen nach einer Anleitung für die Weihnachtsmailbox bekommen, die ich hier gezeigt habe. Wie im ersten Beitrag schon erwähnt ist die Idee nicht von mir, sondern kommt von Silke Trapani und ihrer Homepage bastelsalat. Sie hat dort sogar eine PDF-Anleitung zur Verfügung gestellt. Da meine Maße für die große Version natürlich anders sind, gibt es hier jetzt eine kurze Beschreibung dazu.
I received a ton of requests for a tutorial of the christmas mailbox I showed here. Just to give credit again where it is due, I saw this idea on Silke Trapani’s page bastelsalat, she even posted a tutorial as pdf. As her tutorial is for the smaller version and is not available in English, I have put together a small description with my measurements for the bigger box including an English translation.
Folgendes Material brauchst Du:
- Für die Hülle:
- 1x Farbkarton in 29,7 cm x 12,7 cm
- 1x Designerpapier in 20,2 cm x 11,9 cm
- Für die Schublade:
- 1x Farbkarton in 28,5 cm x 16 cm
- 1x Farbkarton in 15,3 cm x 8 cm
You will need the following:
- for the case:
- 1x cardstock measuring 29,7 cm x 12,7 cm
- 1x DSP measuring 20,2 cm x 11,9 cm
- for the drawer:
- 1x cardstock measuring 28,5 cm x 16 cm
- 1x cardstock measuring 15,3 cm x 8 cm
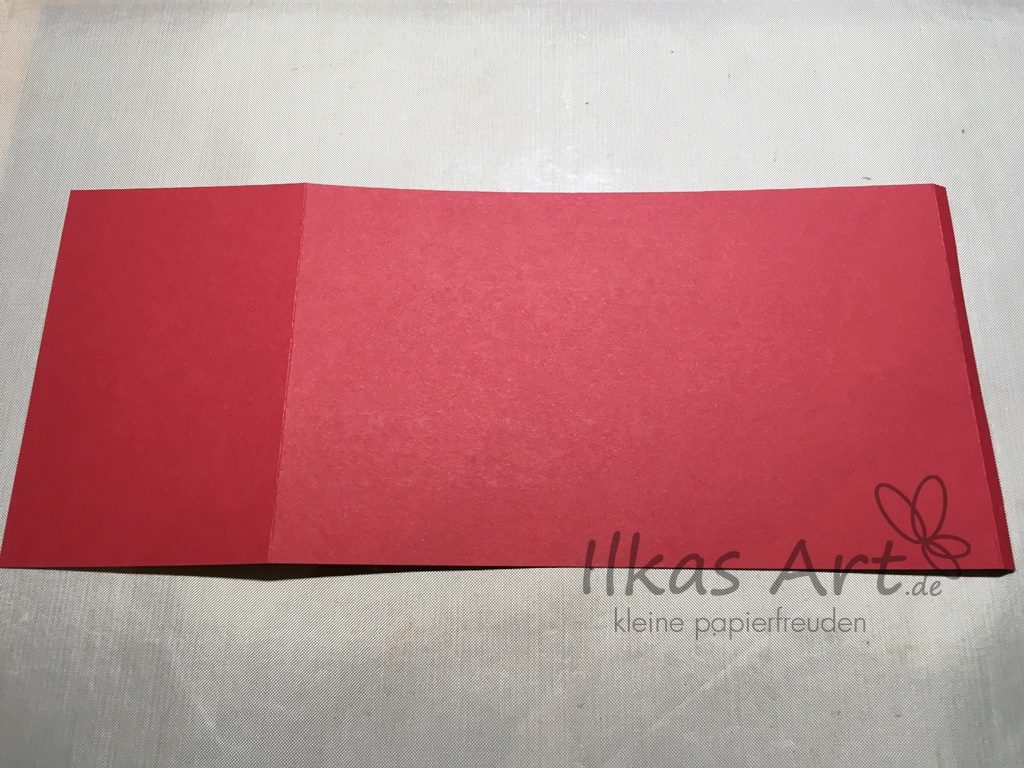
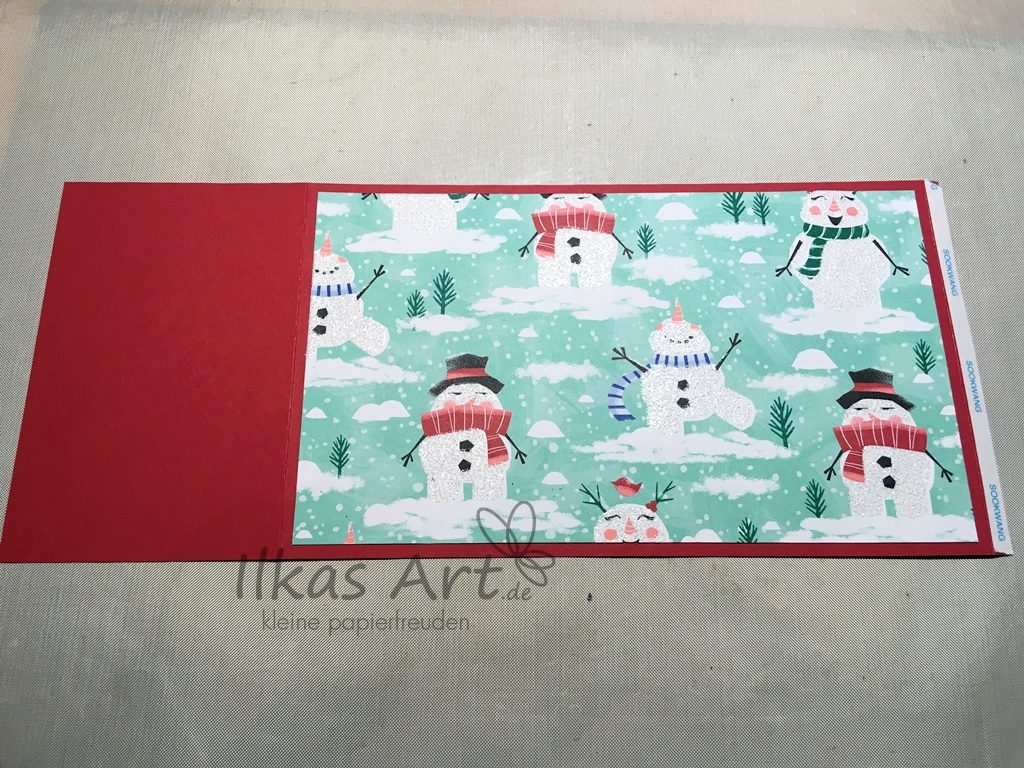
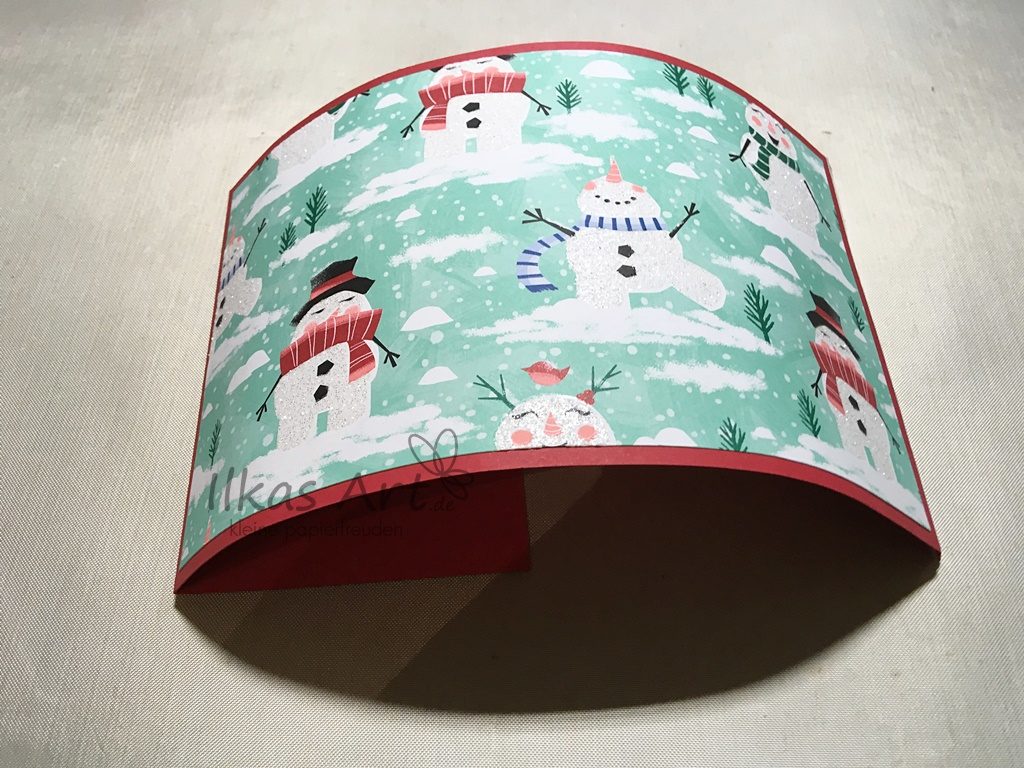
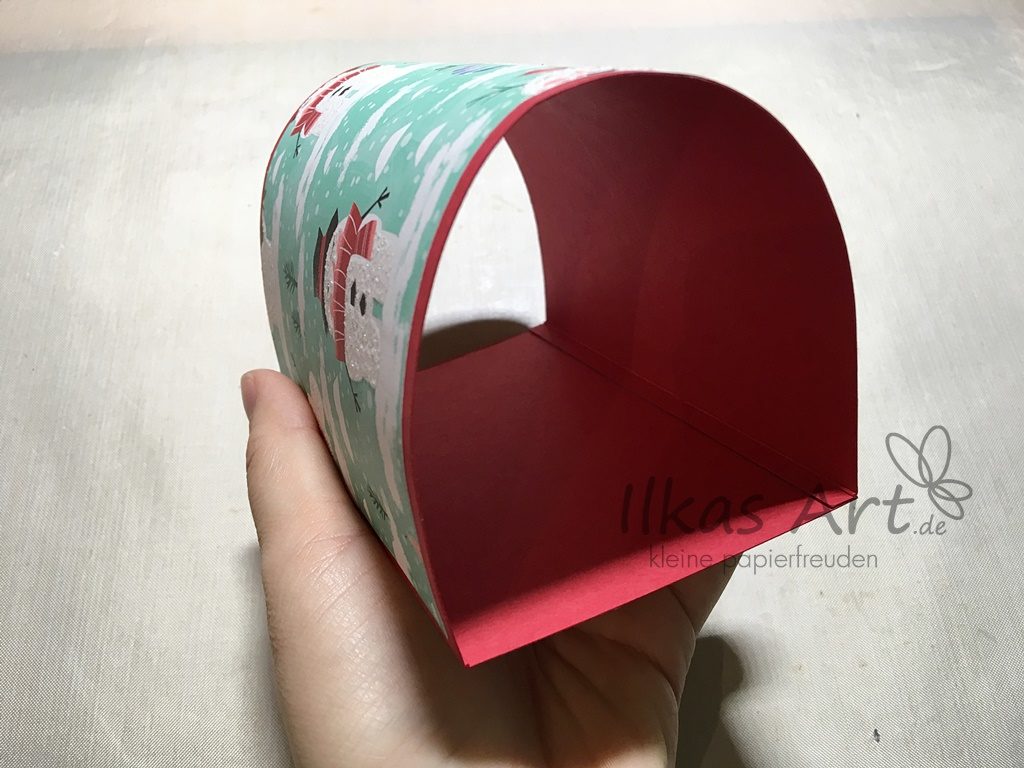
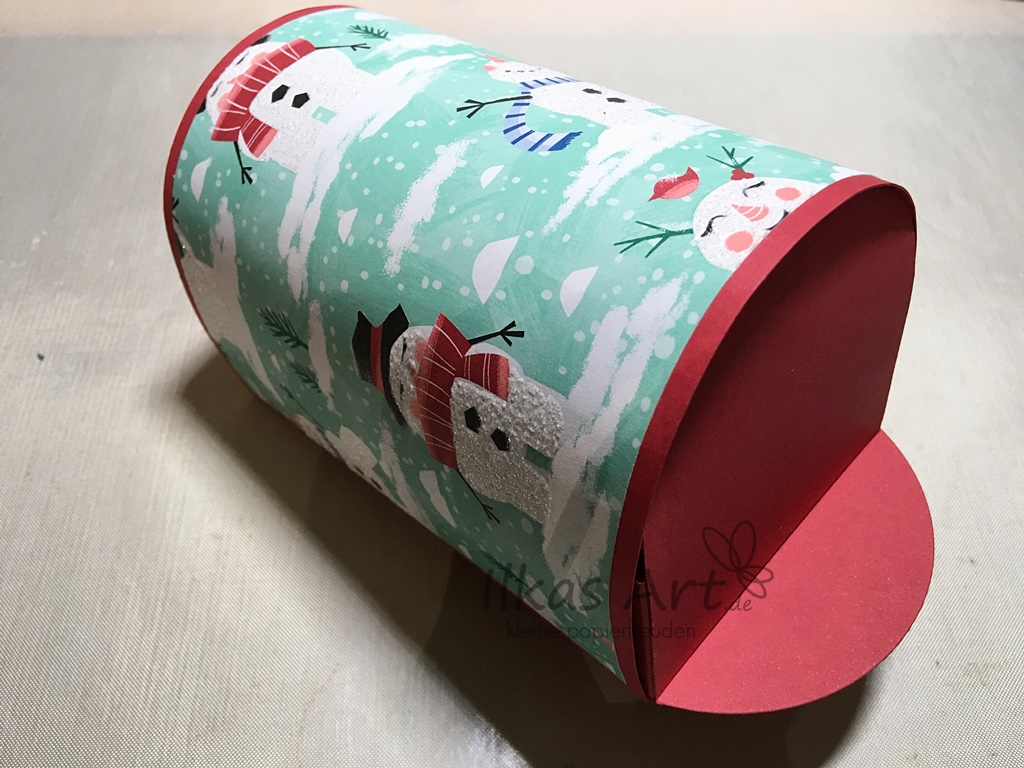
Die Hülle
Falze den Farbkarton auf der langen Seite bei 8,1 cm von der einen Seite und 0,6 cm von der anderen Seite. Dazwischen ist Platz um das Designerpapier festzukleben. Nach dem Aufkleben kann man den Farbkarton über das Falzbein oder eine Tischkante ziehen, um ihn etwas zu runden. Der 0,6 cm schmale Streifen ist die Klebelasche, sie wird am äußeren Rand auf der gegenüberliegenden Seite festgeklebt.
The case
Score the cardstock on the long side at 8,1 cm from one side and 0,6 cm from the other. The DSP is glued down between the two score lines. After that drag the cardstock over the bone folder or over the edge of the table to help round it. The narrow strip of 0,6 cm is the glue tab, stick it down on the edge of the opposite side.
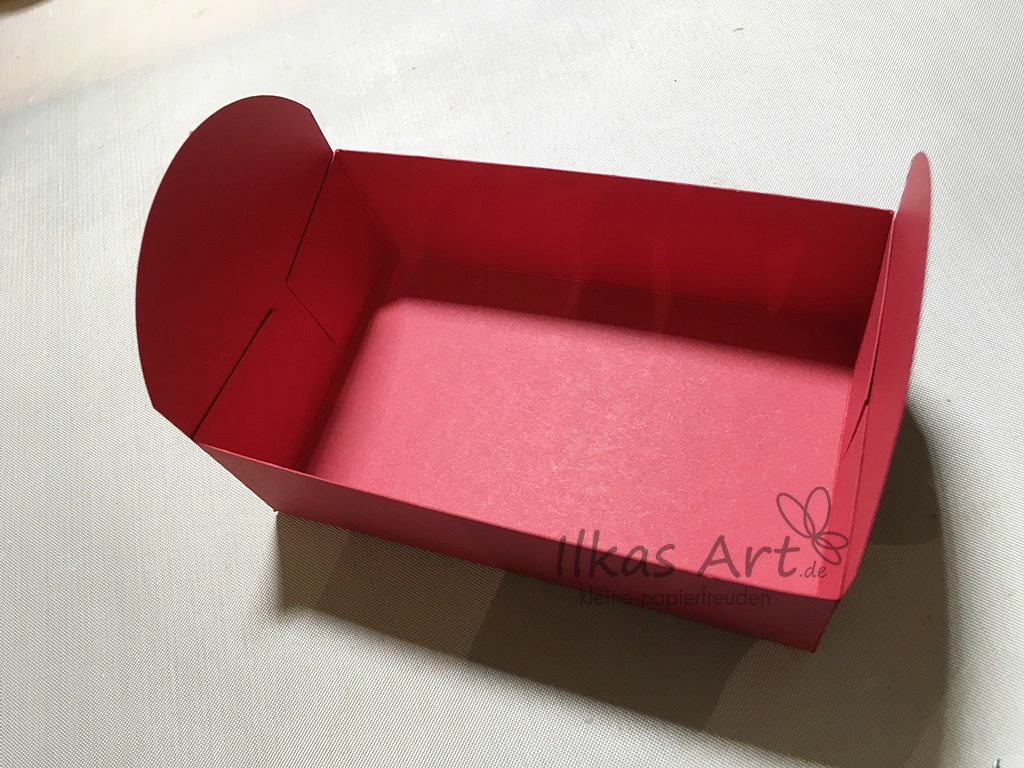
Die Schublade
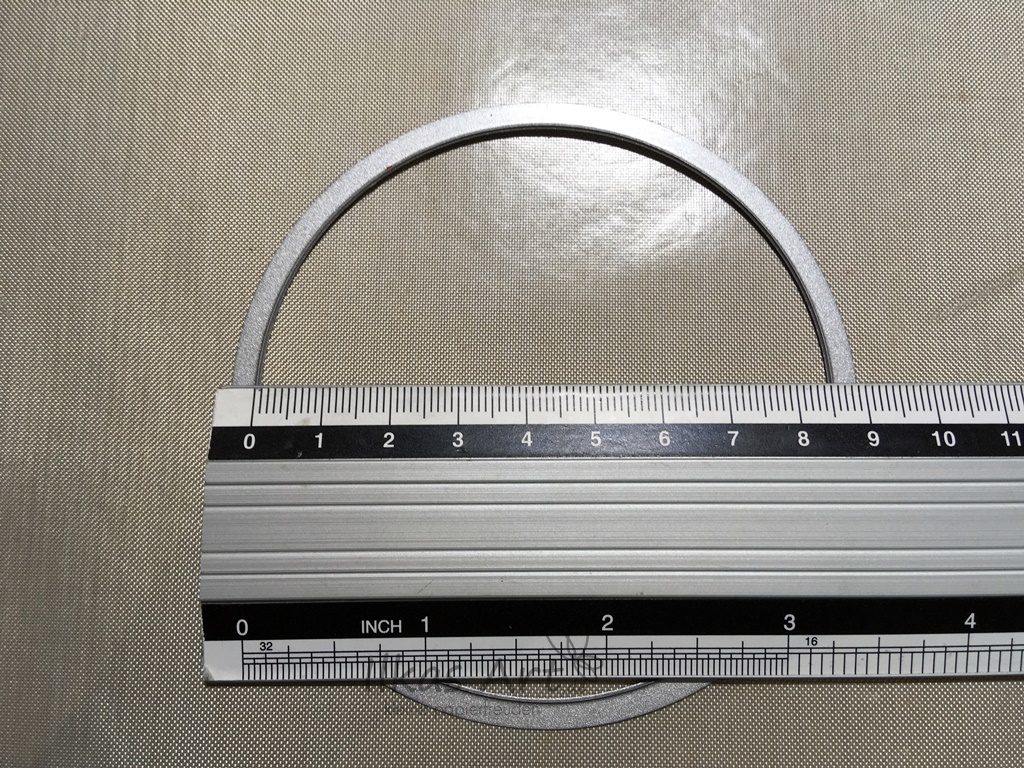
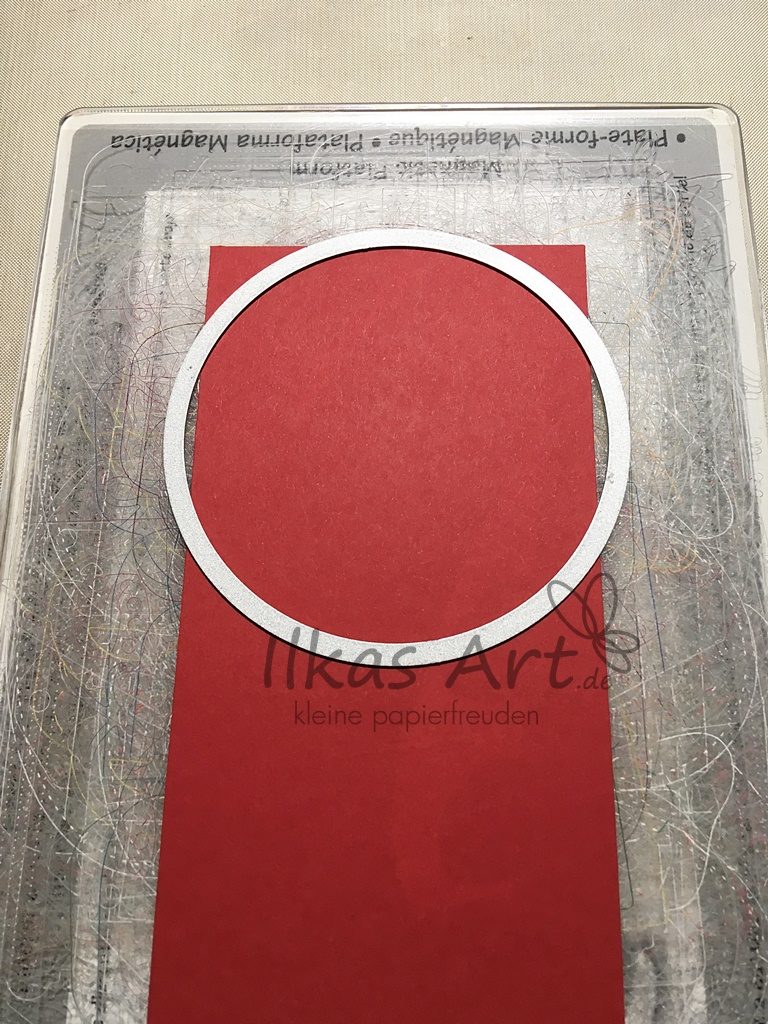
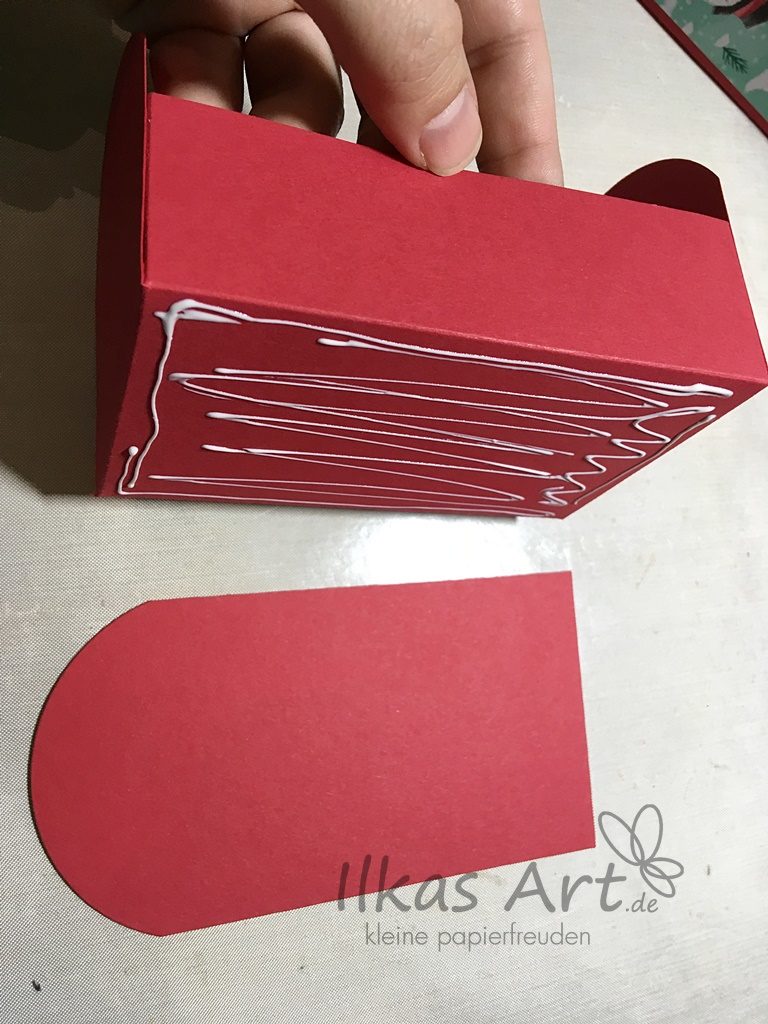
Der Farbkarton mit den Maßen 15,3 cm x 8 cm wird eine Ziehhilfe um die Schublade später einfacher aus der Hülle ziehen zu können. Um die Kante abzurunden habe ich eine Kreisstanzform der Größe 8,5 cm benutzt (ca. 3 3/8 Zoll). Sie wird ganz knapp an die obere Kante gelegt und nur bis zum Widerstand durch die Big Shot gedreht, dann wieder zurück. So wird nicht der ganze Kreis gestanzt sondern nur die obere Kante.
The drawer
The cardstock measuring 15,3 cm x 8 cm will be used to pull the drawer from the box more easily. To round the edge I used a circle die measuring 8,5 cm (about 3 3/8 inches). It is placed right on the edge of the cardstock. This side is put into the Big Shot first and the handle is only cranked so far that you feel a bit of resistance, and then back. This way it’s not the whole circle that is cut but only the upper edge.
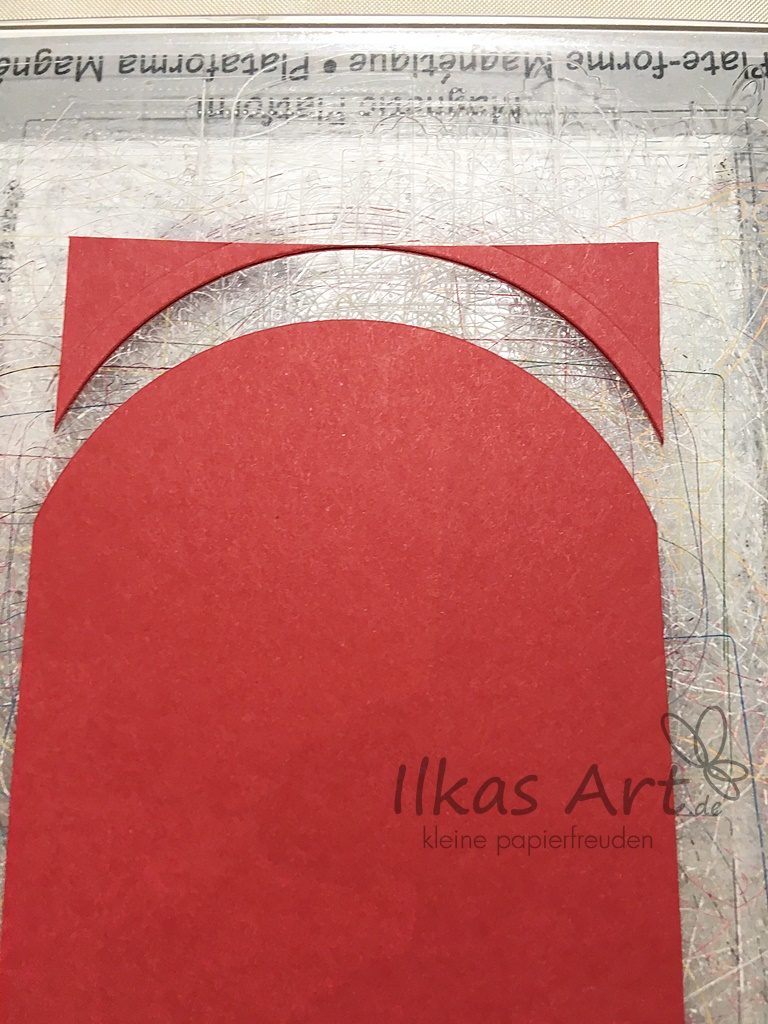
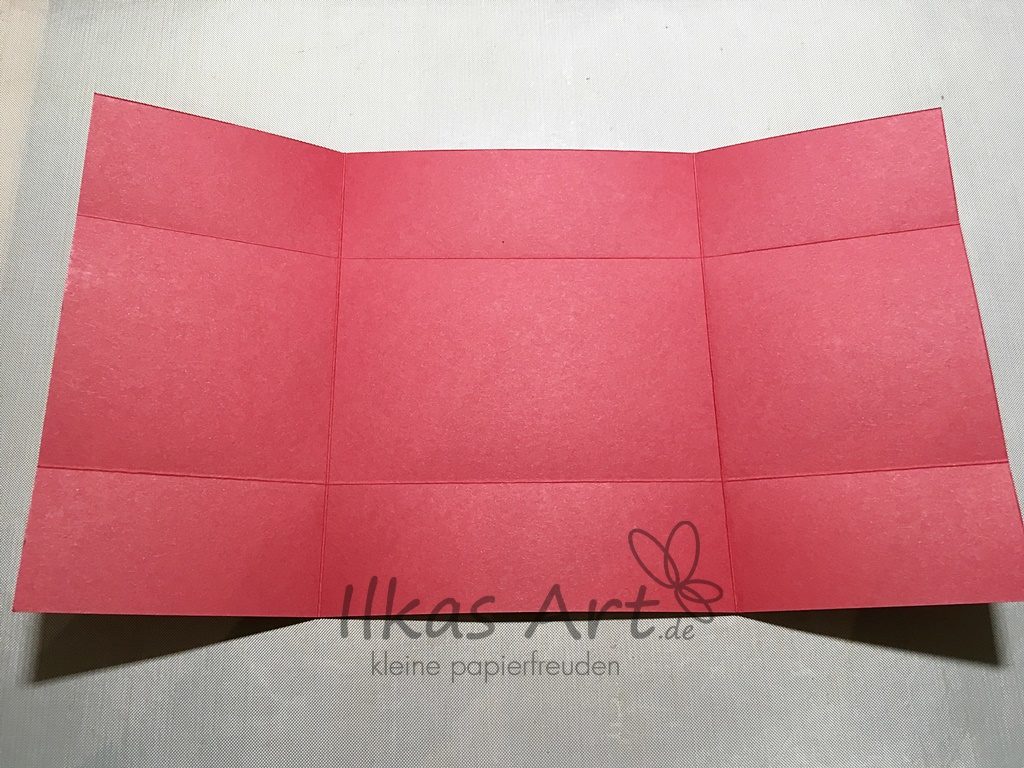
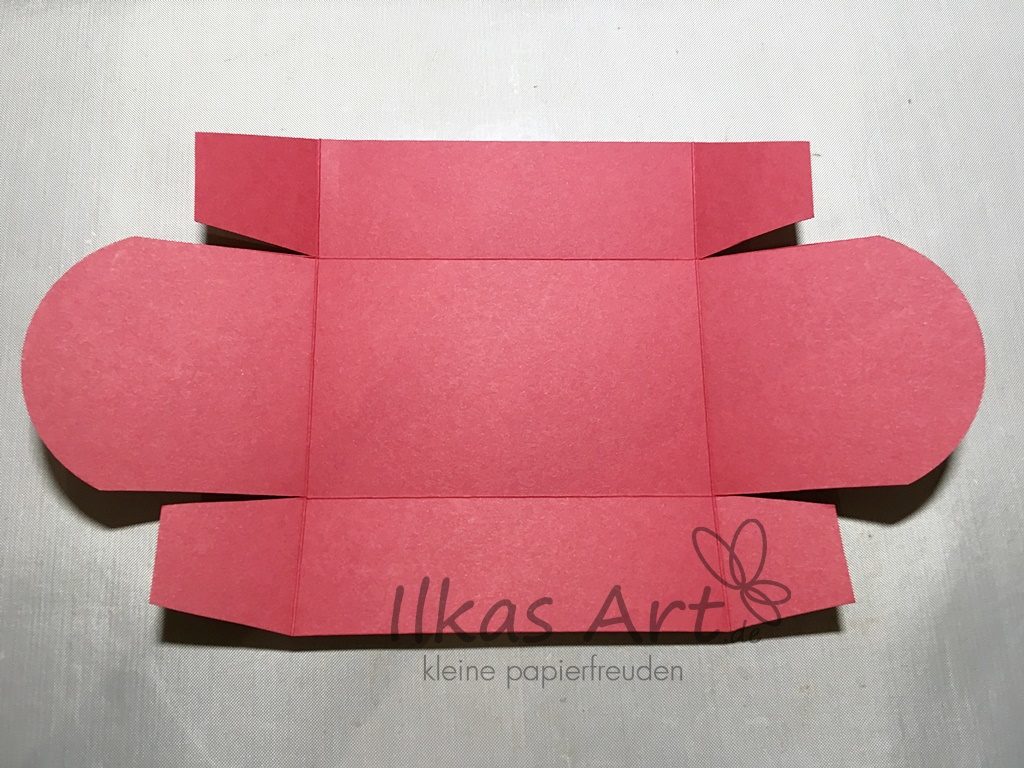
Das große Stück Farbkarton mit den Maßen 28,5 cm x 16 cm wird auf der langen Seite bei 8 cm von beiden Seiten gefalzt, auf der kurzen bei 4 cm von beiden Seiten. Die Ecken werden eingeschnitten und ungefähr halbiert, so dass Klebelaschen entstehen. Der übrige Teil in der Mitte wird genauso abgerundet wie oben beschrieben.
The bigger piece of cardstock measuring 28,5 cm x 16 cm is scored at 8 cm from both ends on the long side, and at 4 cm from both ends on the short side. The rectangles in the corners will be the glue tabs, so cut them down to the first score line and trim them down to approx. half the size. The piece left in the middle is rounded in the same way as described above.


Die Unterseite der Schublade wird jetzt auf die Ziehhilfe geklebt. Anschließend kann man die Schublade in die Hülle schieben. Falls die Rundung noch nicht ganz passt, kann man die überstehenden Ecken einfach mit der Schere zurechtstutzen.
The bottom of the drawer is now glued to the piece for the handle, then it can be slid into the box. If the curve doesn’t quite fit simply trim down any excess using scissors.


Fertig! Jetzt einfach nur noch weiter dekorieren.
Done! Now all that’s left is to decorate.
Merci beaucoup pour ce partage!